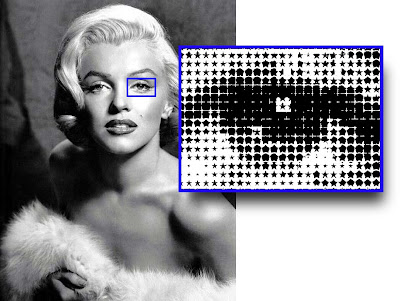
Perhaps a "Star" dot to reflect the iconic status of the subject:
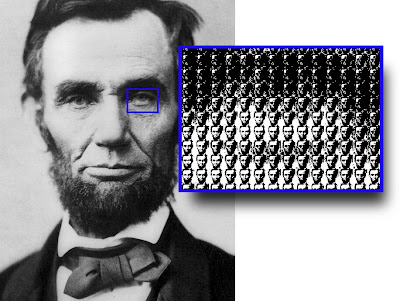
Or you could even use the subject itself as the dot shape:
How to create a custom halftone dot
A halftone screen is built using several components. The two that are needed to create a custom halftone are the "spot function" which defines the shape of the dot and the "threshold array" which determines how each dot is created.
The spot function can be any graphic, including a photographic image. It should be visually simple, made up of 256 levels of grey and fit into a square shape.
For this example we'll use the Apple logo for the spot function - making it our custom halftone dot.
 To convert it into a threshold array we'll use the blend tool in Adobe Illustrator:
 On the left is the original logo in Illustrator. Next is the logo at two sizes - the small black apple in front of the larger white logo. The third graphic is a 256 level Illustrator blend of the small black apple and large white one. The graphic is then imported into PhotoShop and cropped to minimize the amount of white in the graphic. This will become our threshold array:
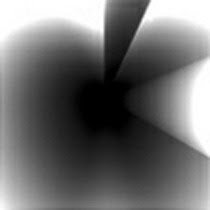
To apply the custom halftone dot:
1) In Photoshop, reduce the apple image to make a "dot" the size desired for the final image. For example: an image that is 75 pixels wide would make 8 dots per inch for a 600 pixel wide image. Use "Image"--> Image Size to change the entire image as required.
2) Select the apple image with the Rectangle Selection Tool. Then choose Edit--> Define Pattern. Give it a name (in this case "Apple logo") and press OK.
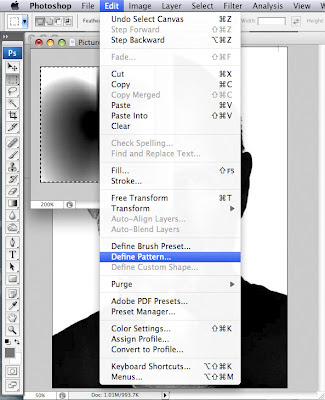
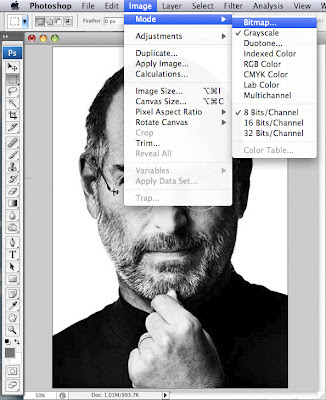
3) Halftone the original image by choosing Image--> Mode--> Bitmap. For "Method", choose "Custom Pattern" and then choose the "Apple logo" pattern. Then enter an Output Resolution. The amount entered will determine how small the halftone dot will be in the final image. The higher the number, the smaller the dots. Choose a resolution that is a multiple of your target output device's resolution. For example, if your output device has a resolution of 2,400 dpi, choose 2,400, 1200, 600, or 300 dpi for the bitmap.
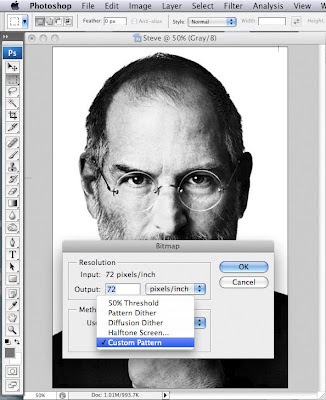
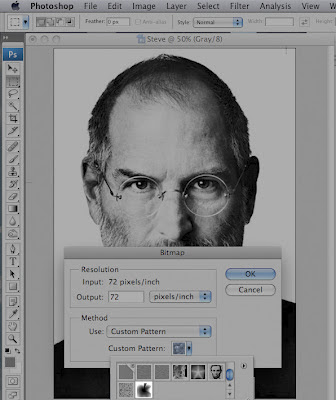
Click OK.
Voila! Steve Jobs is now rendered with a custom halftone using the Apple logo as the dot shape.
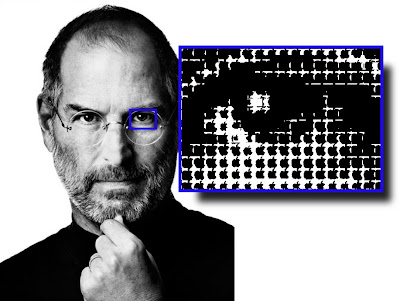
While black and white images are the easiest to do as well as the most effective, it is possible, with a bit more experimentation to do a 4/C image. This one uses the Star dot. Click on image to enlarge:
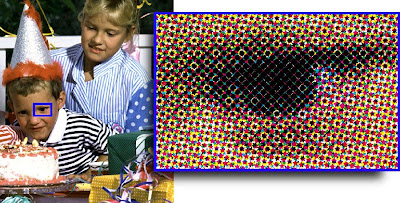
Because you can't rotate the halftone screens for each of the process colors - the trick is to take each process color channel and rotate it to the correct angle, screen it and then rotate back so that they overlay correctly and recompose the image. Here is the step by step process:
 Open each channel as a new document. Rotate each channel to the correct angle: C +15º, M+75º, Y 0º, K +45º.
 Convert each channel to a bitmap using the pattern/threshold array. Convert each channel back to greyscale. Rotate each one back to its original 0º state, C -15º, M-75º, Y 0º, K -45º. Finally, return each bitmapped channel into a composite CMYK image and align the channels.
How did you get the halftone to be various sizes? Ive been able to overlay the pattern but for some reason the "dots" are all the same size...
ReplyDeleteI have added a few images that will hopefully make the steps clearer to follow.
ReplyDeleteHi Mr.Gordon,
ReplyDeleteVery big fan of your articles and insights.
Kindly let us know whether we can get customised dot shapes for HP Indigo also.
If so kindly let us know how to do it?
Best regards
Ganesh
how did you get the halftone to change in size?
ReplyDelete