There are basically 8 established ways to print contone images with added vibrancy – i.e. Hi-Fi color. Most require a great deal of testing and experimentation. Many will be problematic from a proofing point of view, however, the testing process can often provide samples that can be used give buyers a good enough idea as to what their specific finished product would look like. Note that the extra vibrancy achieved on press with these processes is dependent on the gamut of the images selected for this process. Images that are already well housed within the standard cmyk color gamut will likely not benefit from the Hi-Fi gamut and therefore show no visible difference compared to a standard four color process image.
In order from simplest to most complex:
1) Increase solid ink density.
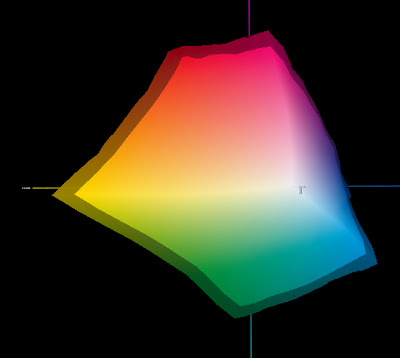
Solid ink densities can often be increased by about 20-30 points from industry standards on presses which have aqueous coaters. Curves are applied to plate to normalize dot gain (restore tone reproduction). Extra saturation affects all color areas on the page. Testing determines the max density that can be achieved before presswork color becomes unstable, or ink slinging or tailing occurs. Uses existing CMYK images. This is the simplest approach to add punch since the only thing in production that needs to happen, once testing is complete, is to have a curve applied to the plates and new SID targets communicated to the pressroom for jobs targeted for the extra vibrancy. A popular strategy because it does not require anything to change other than a curve applied to the plates. It will increase overall color saturation but may not increase the gamut in areas where CMYK is weak (oranges and purples). A more complete explanation of the process begins HERE. A variation on this method would be to run CMYK at normal SIDs and then do a second hit of CMY also at normal SIDs.
2) Use FM screening.
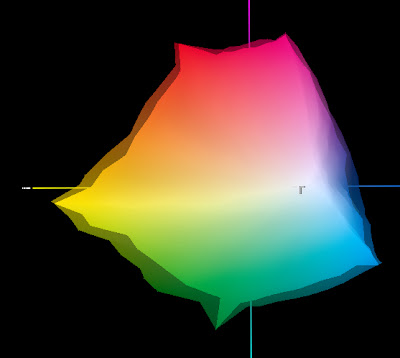
Going to a finer screen, either 20 micron FM or greater than 385 lpi AM/XM screening will provide about 10-15% greater gamut volume compared with 175 lpi AM/XM screening. The extra gamut will be available in one and two color screen tint builds only.
3) Big Gamut CMYK
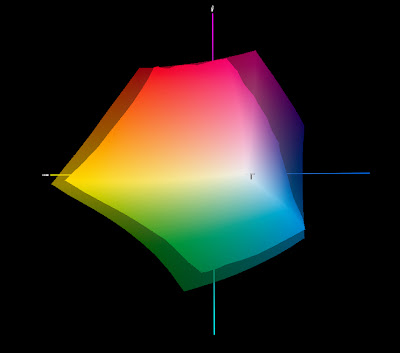
This method uses higher pigment load inks, or spectrally purer colorants (and therefore more expensive inks). Examples are Toyo Kaleido inks and (BASF) Flint Novaspace f 2010 inks. Extra saturation affects all color areas on the page. This method uses existing CMYK images, however existing separations may produce unexpected results. From a production point of view, washups and ink change overs will happen when switching from regular CMYK to Big Gamut CMYK jobs.
4) CMYK plus "bump" (touch plate) color.

Adds gamut only where needed (e.g. oranges, blues, etc.). Manual process in Photoshop to create 5th plate. Requires testing and experimenting to establish workflow. Uses existing CMYK images with added spot color channel to add extra vibrancy within specific images only. Note that the extra ink(s) will need to be formulated to wet trap, be screened, and have a dot gain similar to its closest process color. E.g. Red ink would mimic Magenta in lithographic performance. This method is usually used in fine art reproduction, catalogue, and automotive work to bring specific colors into gamut.
5) Swing process colors.

This uses a standard CMYK ink set where one of the process colors, usually magenta but sometimes the cyan, is swapped out for an alternate. For example, the standard process magenta might be swapped out for a PMS Red 032, Warm Red, Rhodamine Red, or even PMS 2395. This distorts the entire gamut but can be very effective depending on image content. For example, a photo of an orange against green leaves would really pop if a warm red is used instead of a conventional magenta. This method is best used where there are no skin tones present since skin tones would look quite odd. Note that all image content is affected, including text. Requires a lot of experimentation and documented samples.
6) Big "H" Pantone Hexachrome.
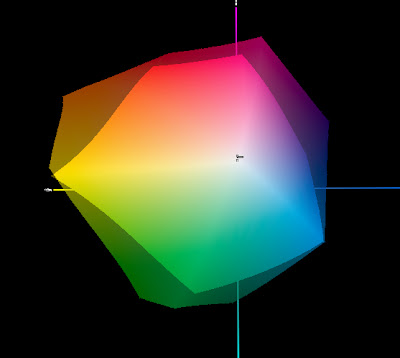
Uses a proprietary 6 color inkset with fluorescing agents in their pigments. Extra vibrancy affects all color areas on the page (images and text). Inks tend to have poor printability. Expensive. Manual process to do separations in Photoshop. It often delivers images that have an "artificial" look. Colors can appear garish rather than natural. Requires testing and experimenting to establish workflow. Complex separated workflow (DCS 2 files).
7) Small "H" Hexachrome.
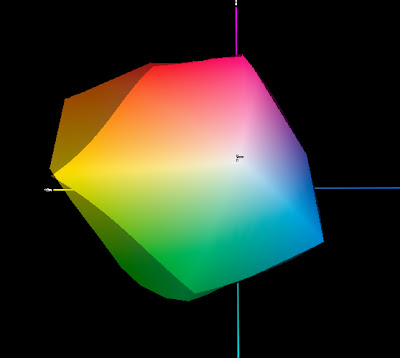
Uses standard CMYK inks plus Orange and Green inks to expand Gamut. Uses Pantone Heximage software from Pantone to do manual separations to 6 color process in Photoshop. Extra vibrancy applies to images only. This method is popular in the label and packaging markets. It can be a good compromise compared to process 5. Complex separated workflow (DCS 2 files).
8) CMYK plus "extended" process colors.
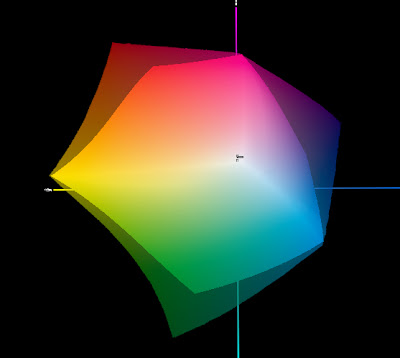
ICC profile based workflow. RGB in and separated to CMYKRG or CMYKRV, or CMYKRGB out. Fully automated process. Requires profiling the press using the appropriate inkset. Creating an RGB to CMYKXX separation profile. The profile is used by the workflow to separate the images as part of the process plan, as delivered to the workflow as a preseparated file. Extra vibrancy applies to images only.
No comments:
Post a Comment